Astral Hawks Space Marine Assault Intercessor Sergeant

Details
| Space Marine Assault Intercessor, Space Marine Sergeant Helmet, Skulls |
Paints Used
![]() Vallejo — Model Color — Neutral Grey
Vallejo — Model Color — Neutral Grey
![]() Citadel — Layer — Evil Sunz Scarlet
Citadel — Layer — Evil Sunz Scarlet
![]() Citadel — Base — Mephiston Red
Citadel — Base — Mephiston Red
![]() Vallejo — Game Color — Gory Red
Vallejo — Game Color — Gory Red
![]() Vallejo — Game Color — Terracotta
Vallejo — Game Color — Terracotta
![]() Vallejo — Game Color — Hot Orange
Vallejo — Game Color — Hot Orange
![]() Vallejo — Game Color — Charred Brown
Vallejo — Game Color — Charred Brown
![]() Vallejo — Model Color — Flat Brown
Vallejo — Model Color — Flat Brown
![]() Vallejo — Game Color — Beasty Brown
Vallejo — Game Color — Beasty Brown
![]() Citadel — Layer — Cadian Fleshtone
Citadel — Layer — Cadian Fleshtone
![]() Citadel — Layer — Ushabti Bone
Citadel — Layer — Ushabti Bone
![]() Vallejo — Model Color — Lime Green
Vallejo — Model Color — Lime Green
![]() Vallejo — Model Color — Park Green Flat
Vallejo — Model Color — Park Green Flat
![]() Vallejo — Game Color — Scurvy Green
Vallejo — Game Color — Scurvy Green
![]() Citadel — Base — Incubi Darkness
Citadel — Base — Incubi Darkness
![]() Citadel — Layer — Thunderhawk Blue
Citadel — Layer — Thunderhawk Blue
![]() Citadel — Layer — Fenrisian Grey
Citadel — Layer — Fenrisian Grey
![]() Citadel — Shade — Reikland Fleshshade
Citadel — Shade — Reikland Fleshshade
![]() Vallejo — Diorama Effects — Rough Grey Pumice
Vallejo — Diorama Effects — Rough Grey Pumice
![]() Citadel — Technical — Agrellan Earth
Citadel — Technical — Agrellan Earth
![]() Stynylrez — Surface Primer — Black
Stynylrez — Surface Primer — Black
![]() Krylon — Clear Coatings — Matte Finish
Krylon — Clear Coatings — Matte Finish
![]() Krylon — Color Maxx — Satin Crystal Clear
Krylon — Color Maxx — Satin Crystal Clear
![]() Vallejo — Auxiliaries — Airbrush Thinner
Vallejo — Auxiliaries — Airbrush Thinner
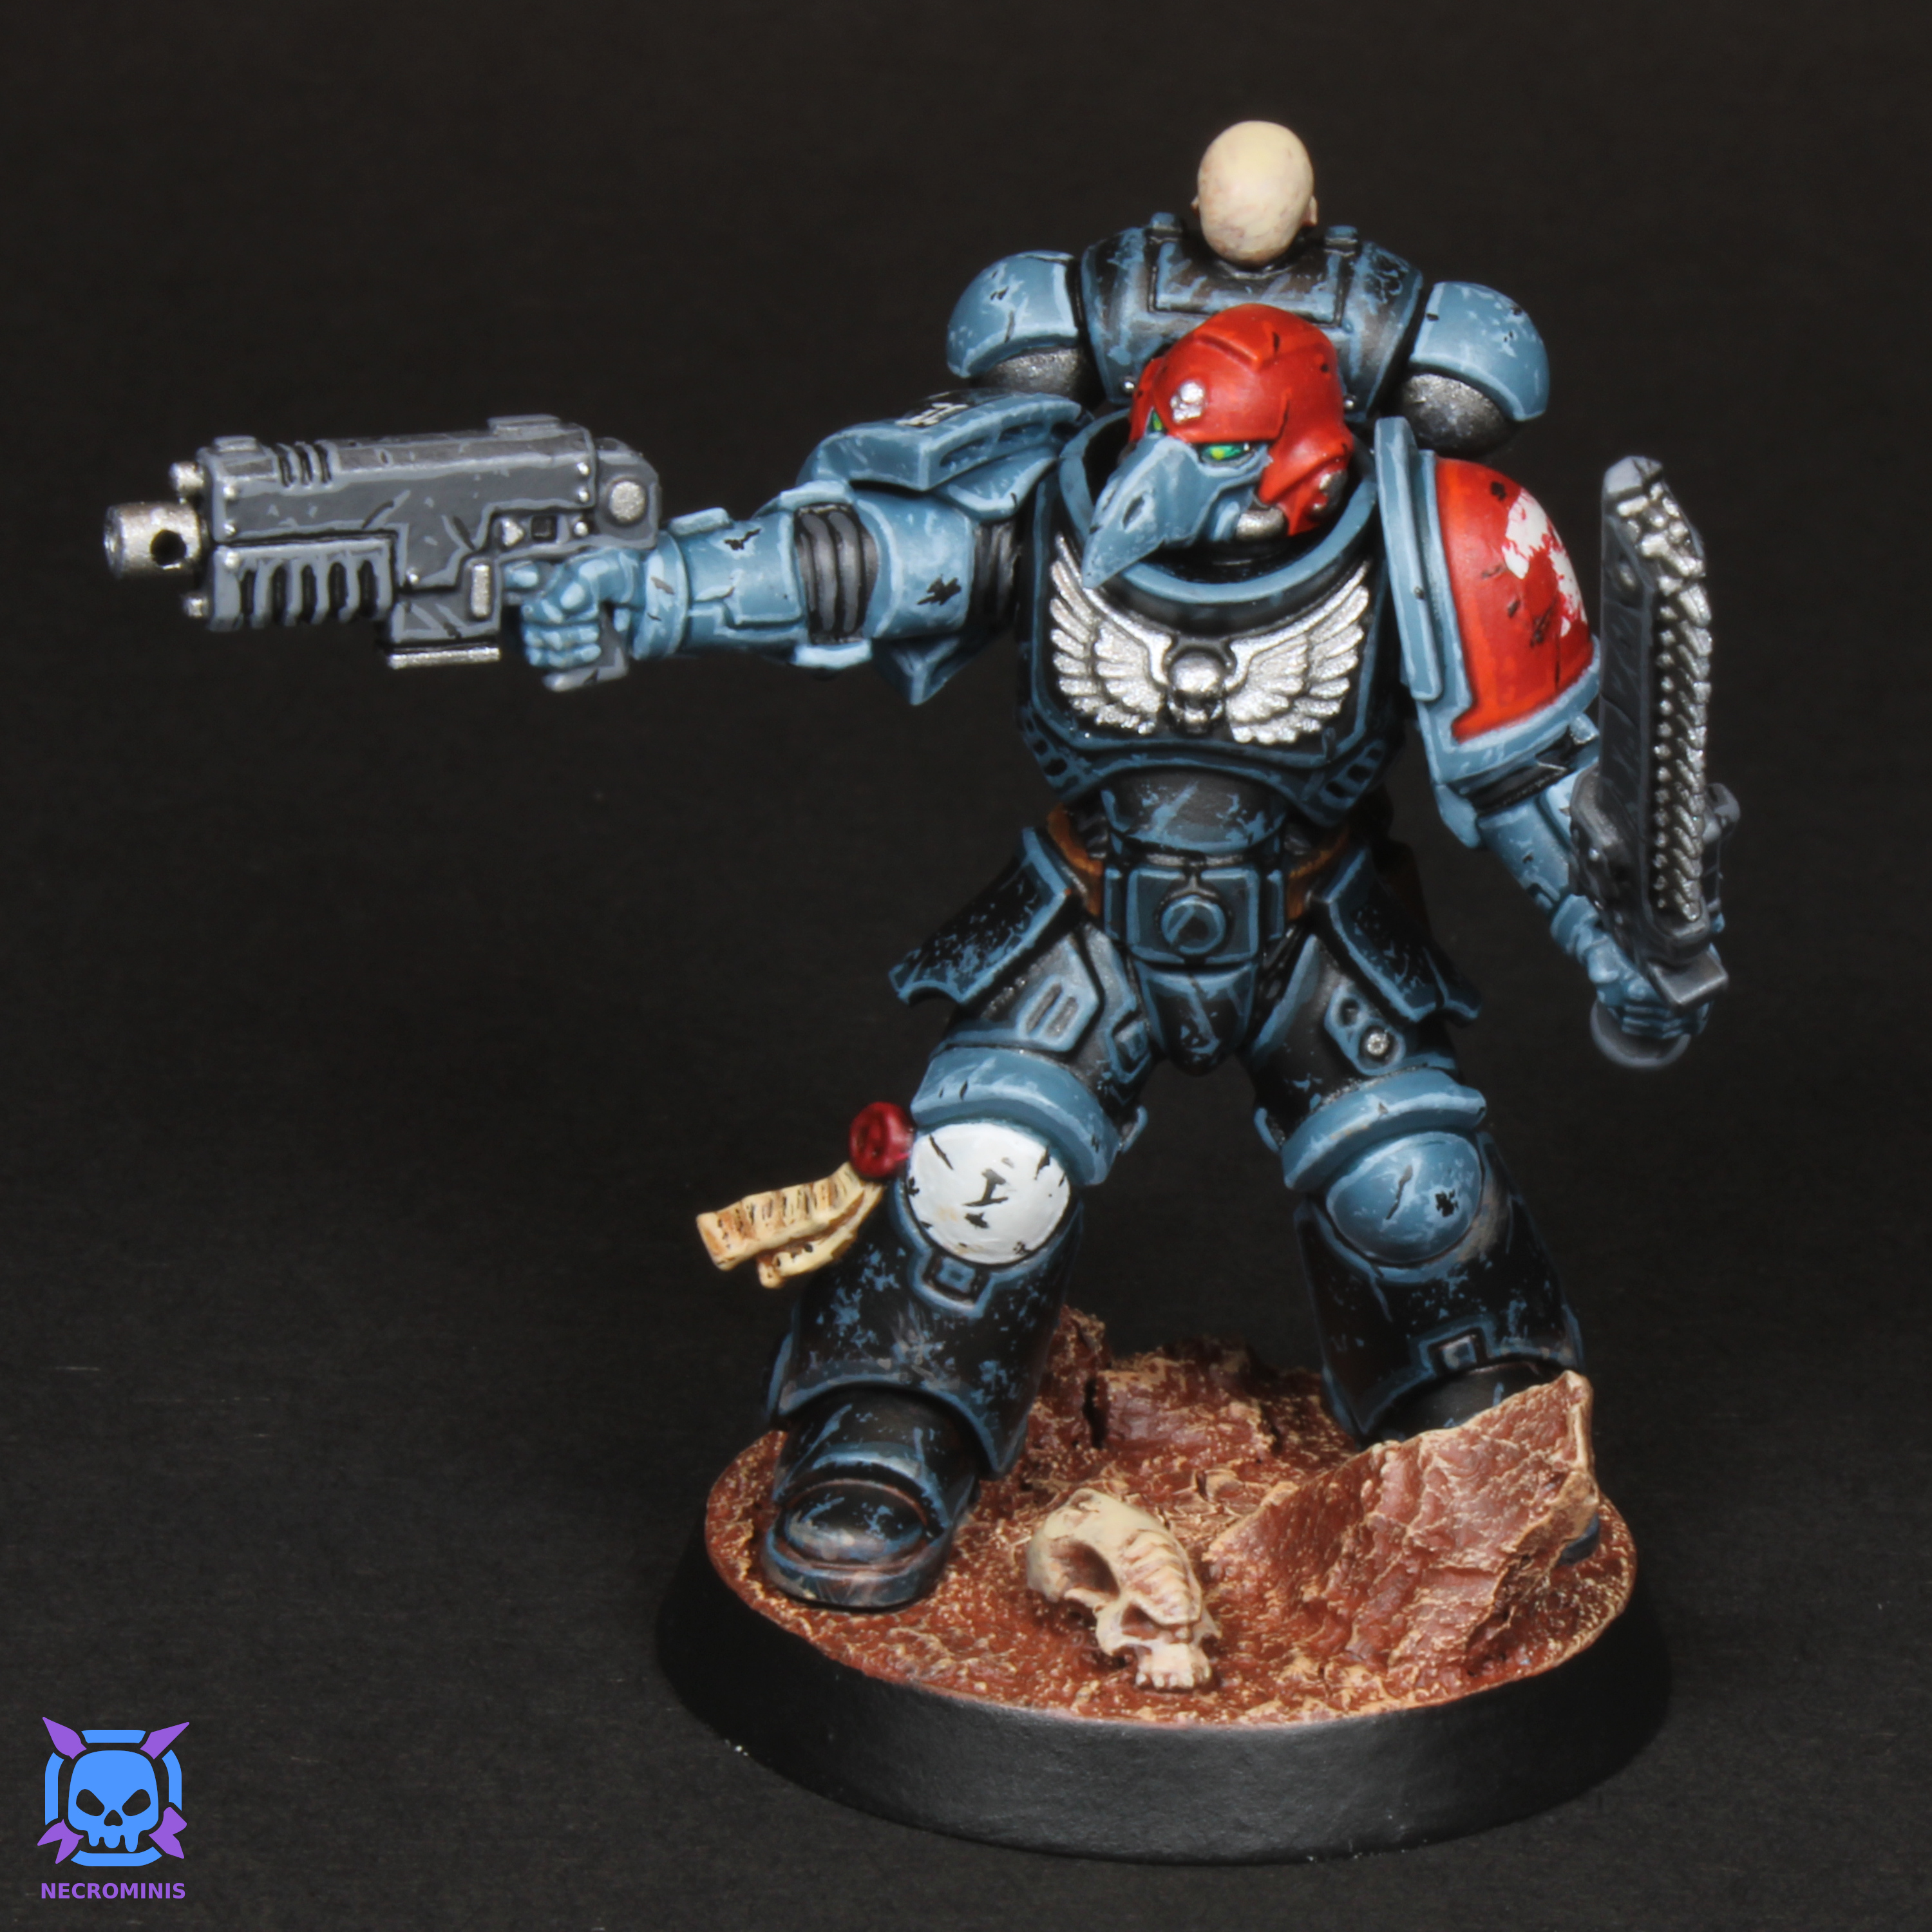
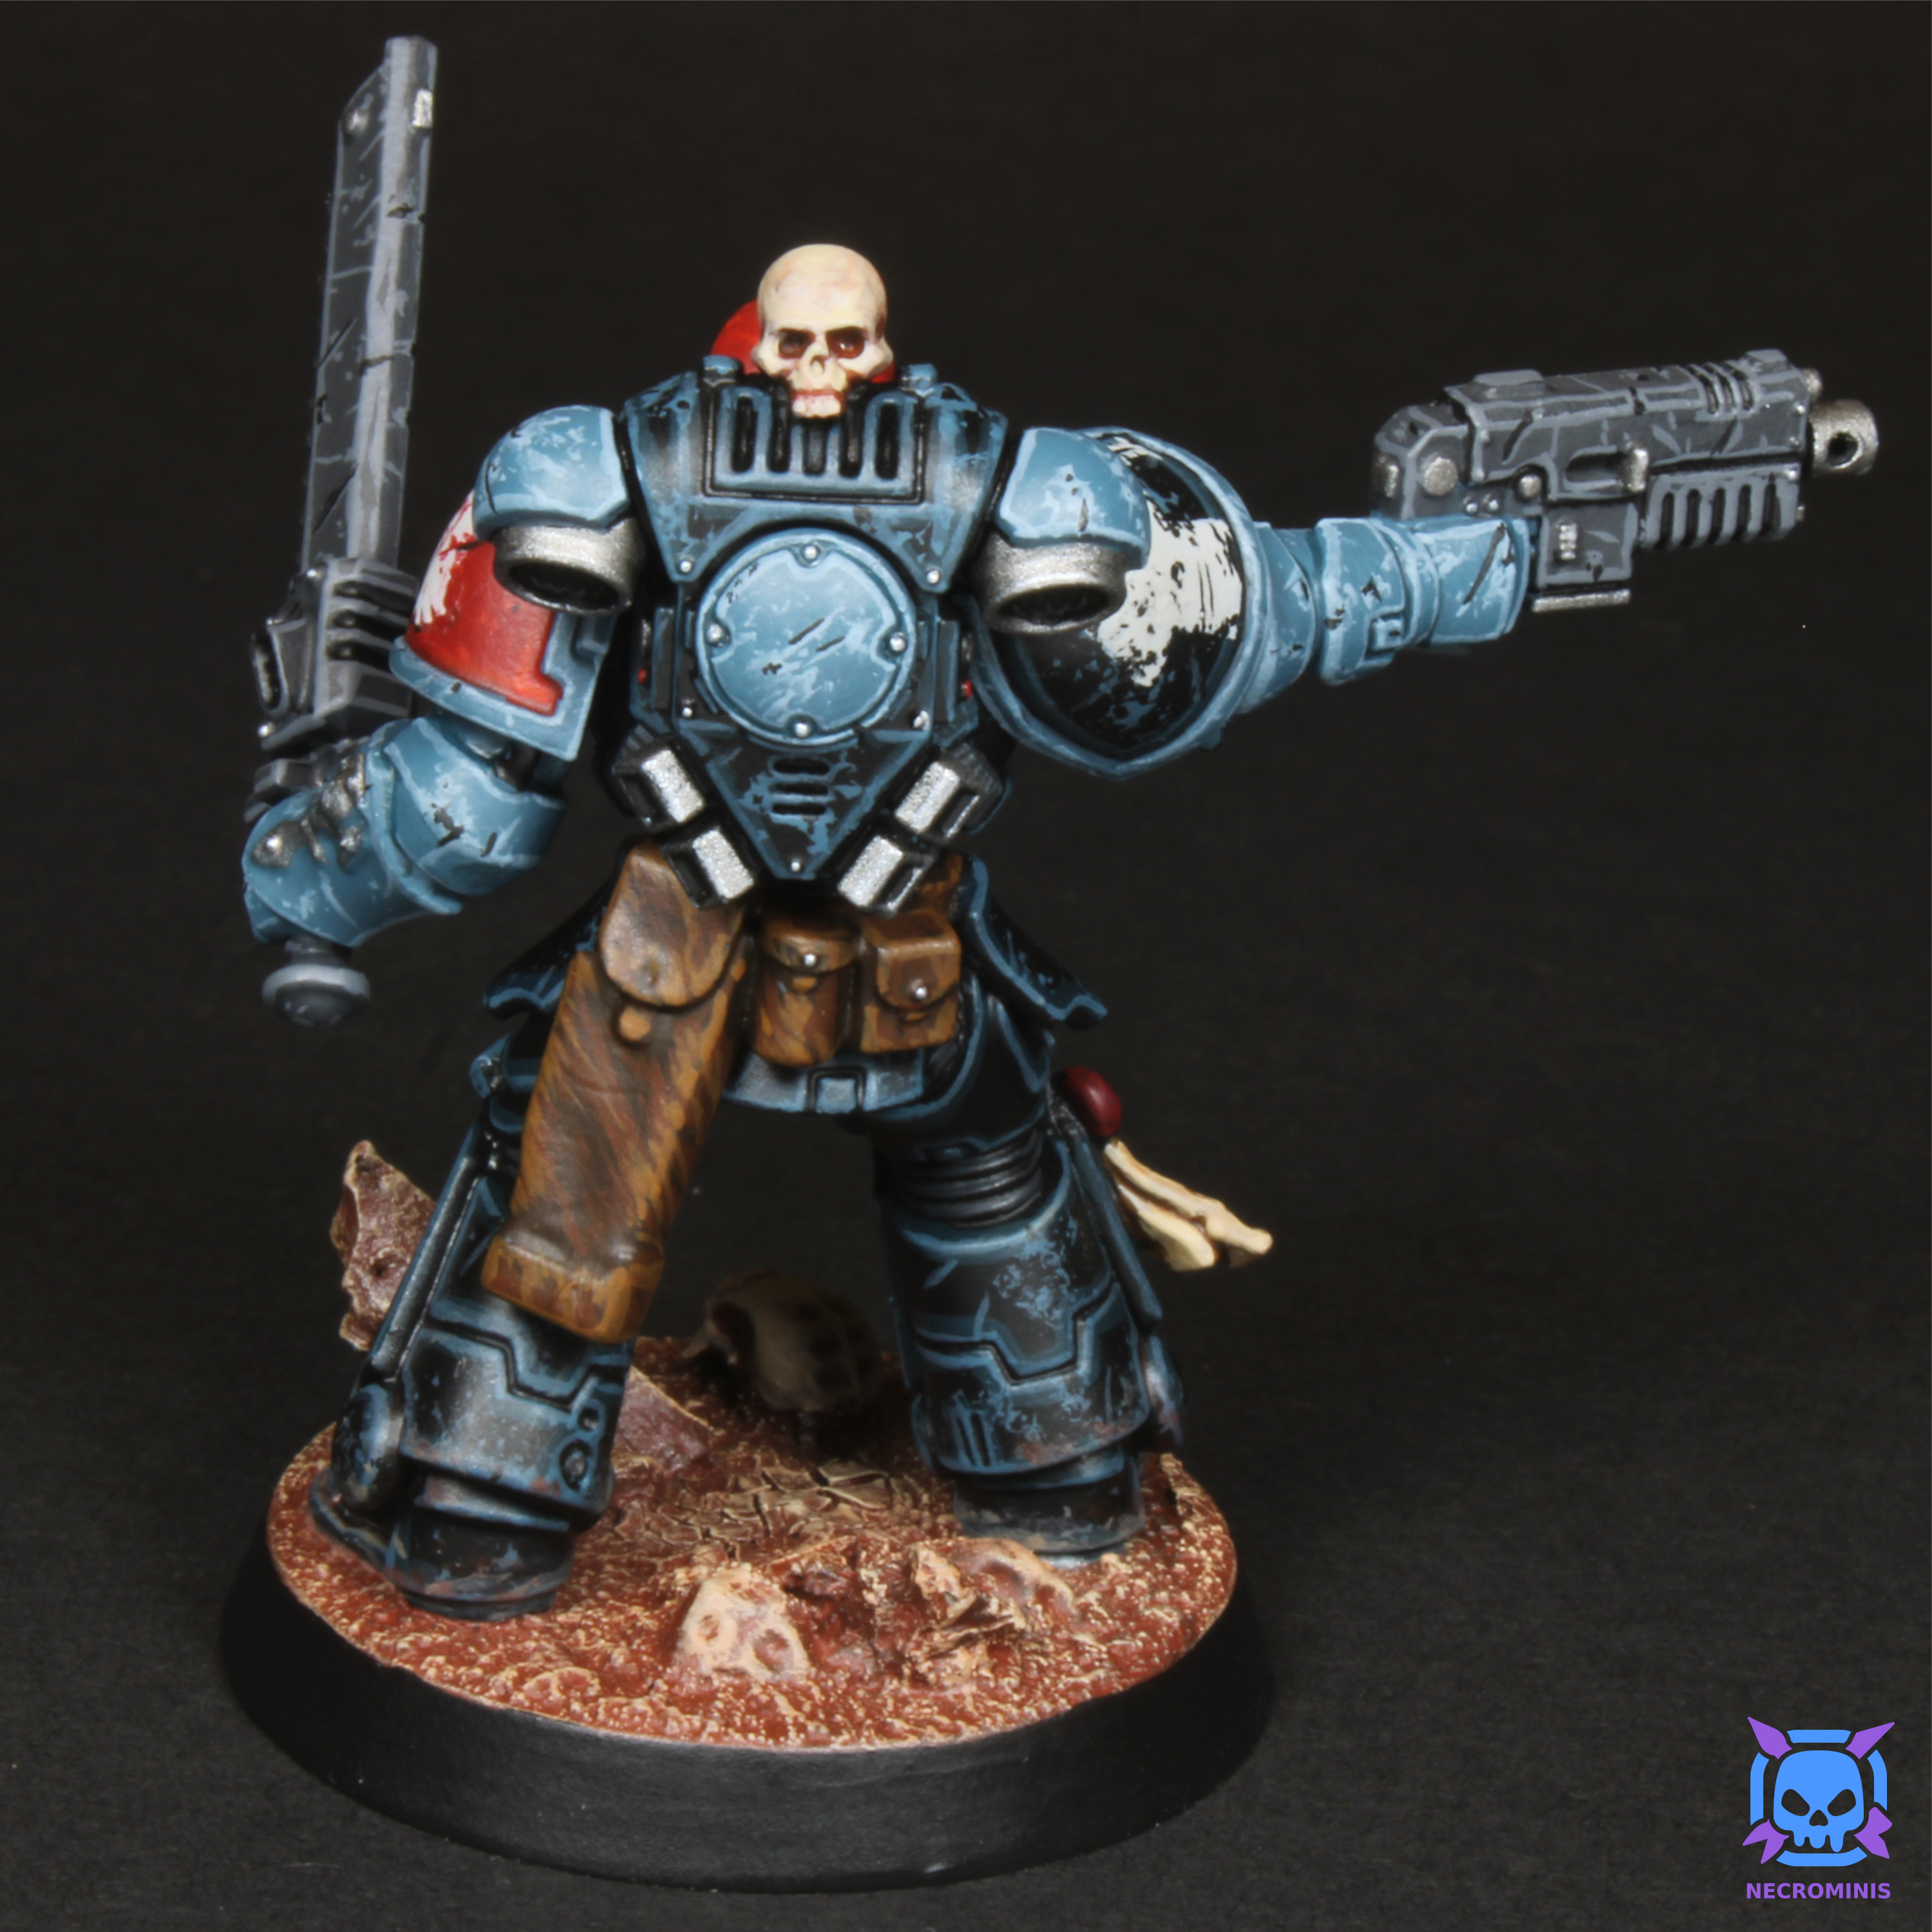
A Space Marine Assault Intercessor Sergeant painted as a member of the Astral Hawks Space Marine chapter.
This miniature was a created to test my color scheme and techniques before I use them for the entirety of my upcoming army. Because of this, I’ll go into greated detail on the colors and techniques used to make this mini.
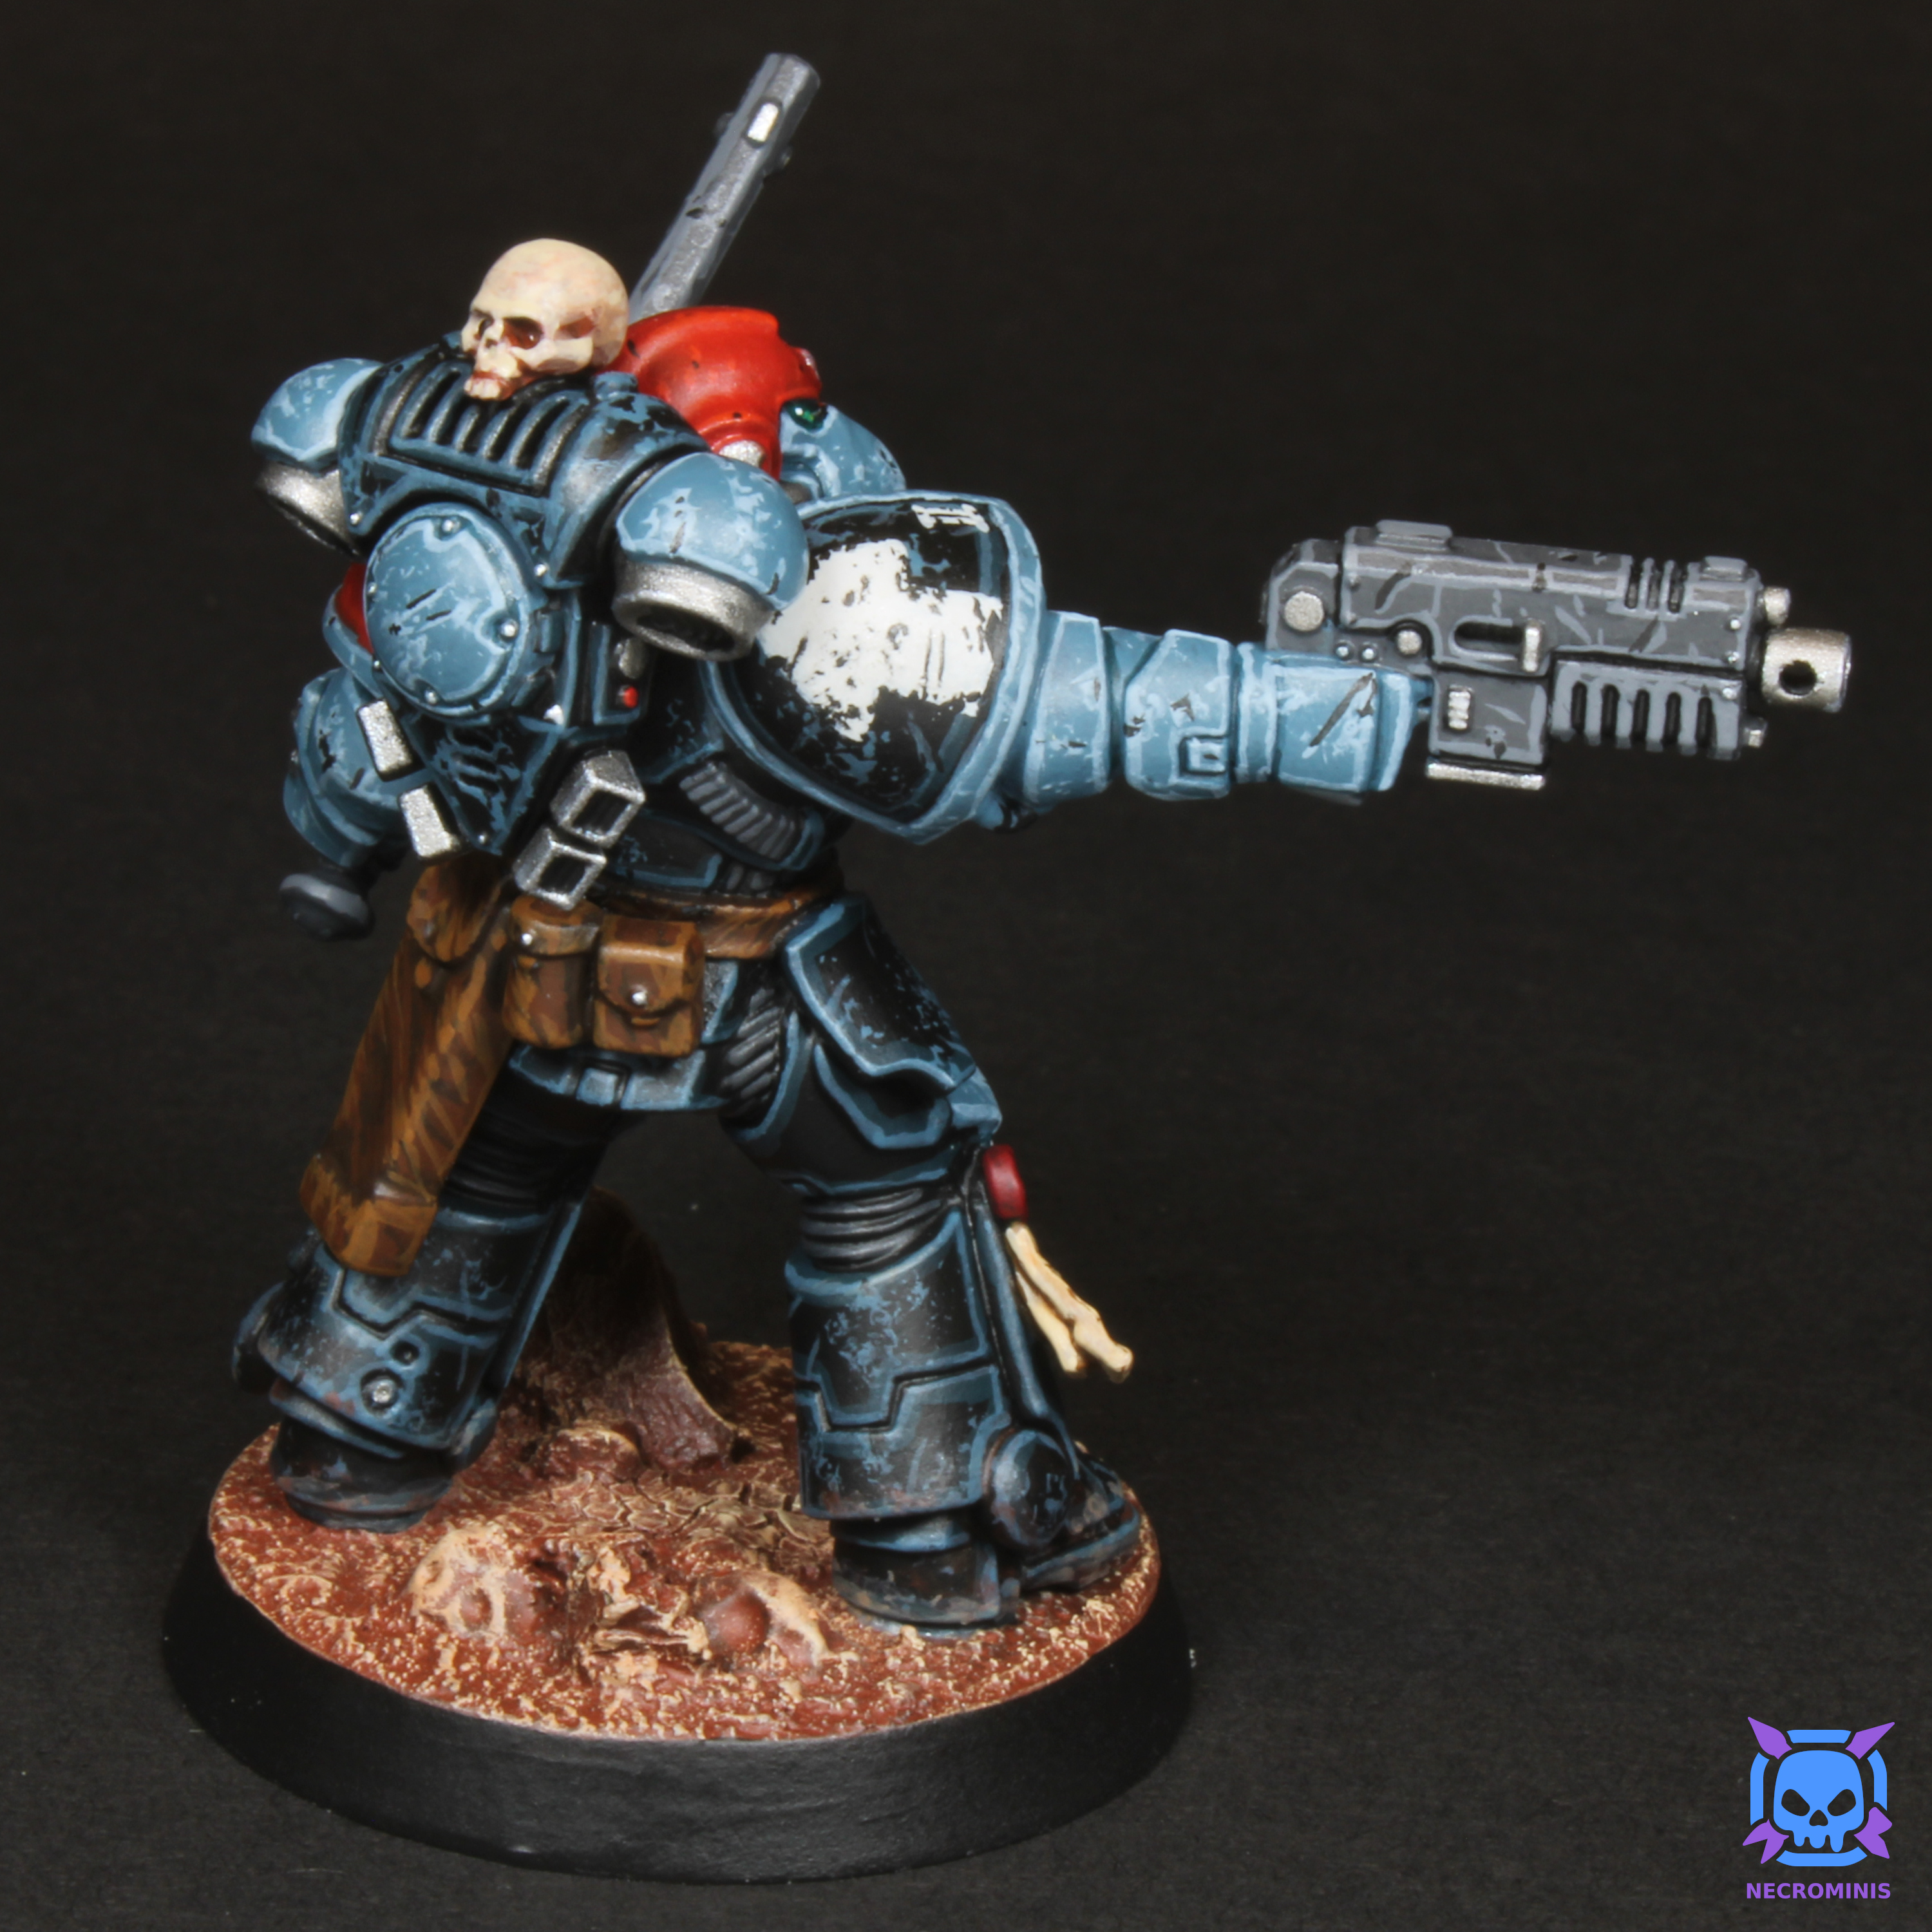
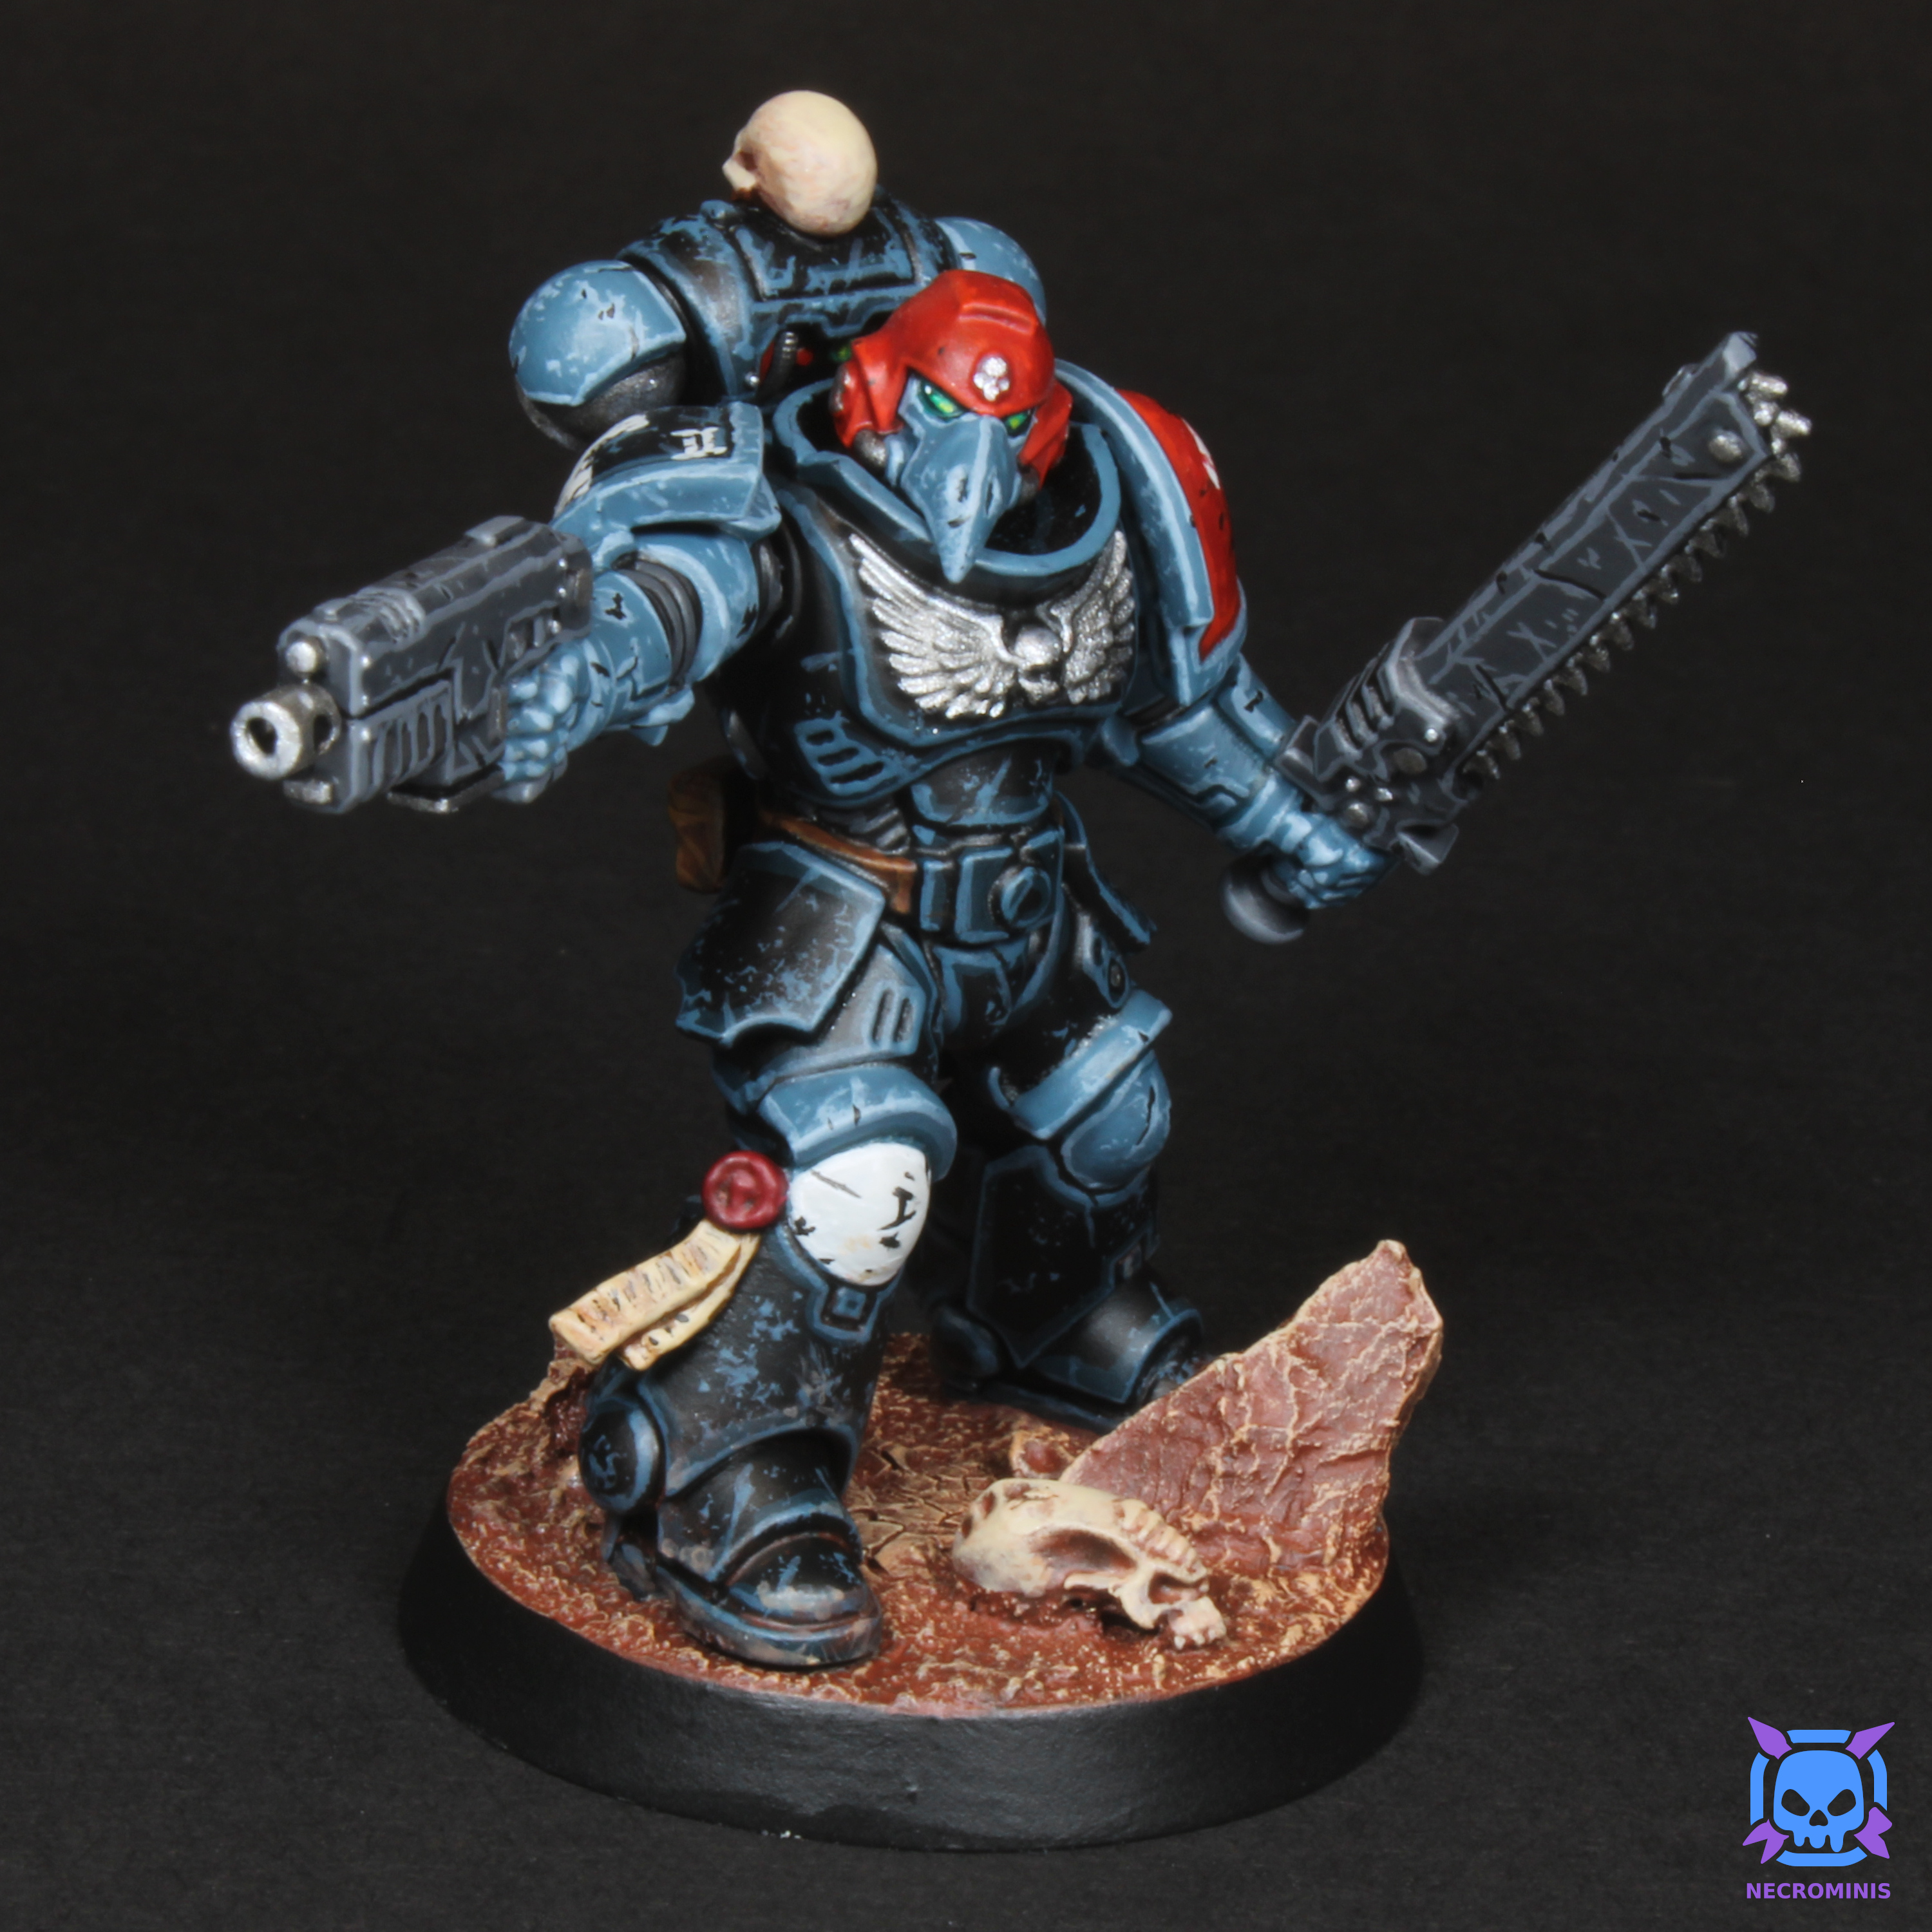
Before I could paint the miniature, I created a custom helmet, added a skull to the backpack, and added more detailed terrain to the base. I decided to kitbashKitbashing is a term that describes combining multiple model "kits", by cutting and gluing different parts together to create a more customized model. a custom helmet because I’m planning on replacing the Space Marine helmets with ones that have bird beaks, as an homage to the fact that this army is called the Astral Hawks. I have some 3D models that I’ll be 3D printing3D printing is the construction of physical objects from a digital 3D model file, using a machine called a 3D printer. in the future, but for now I thought I’d test making a helmet myself, since I’m impatient. Since I wanted to test a scheme for leadership, rather than a basic foot-soldier, I swapped the helmet with a spare sergeant helmet (which is exactly the same but with a small skull on the forhead). I then shaved the front vents off, to make room to glue the beak on. The beak was clipped off of a bird skull from the Citadel Skulls set. I trimmed the parts with a knife until they mostly fit together, and then used some Green Stuff to fill the gaps as I glued them together. I used some silicone sculpting tools to try to smooth the Green Stuff’s transition as much as possible. I then glued a human skull from the same set onto the backpack, for some added detail. Finally, I used some Milliput to fill in the gaps created by the mold parts, and drilled the gun barrel hollow, using my small hand drill.
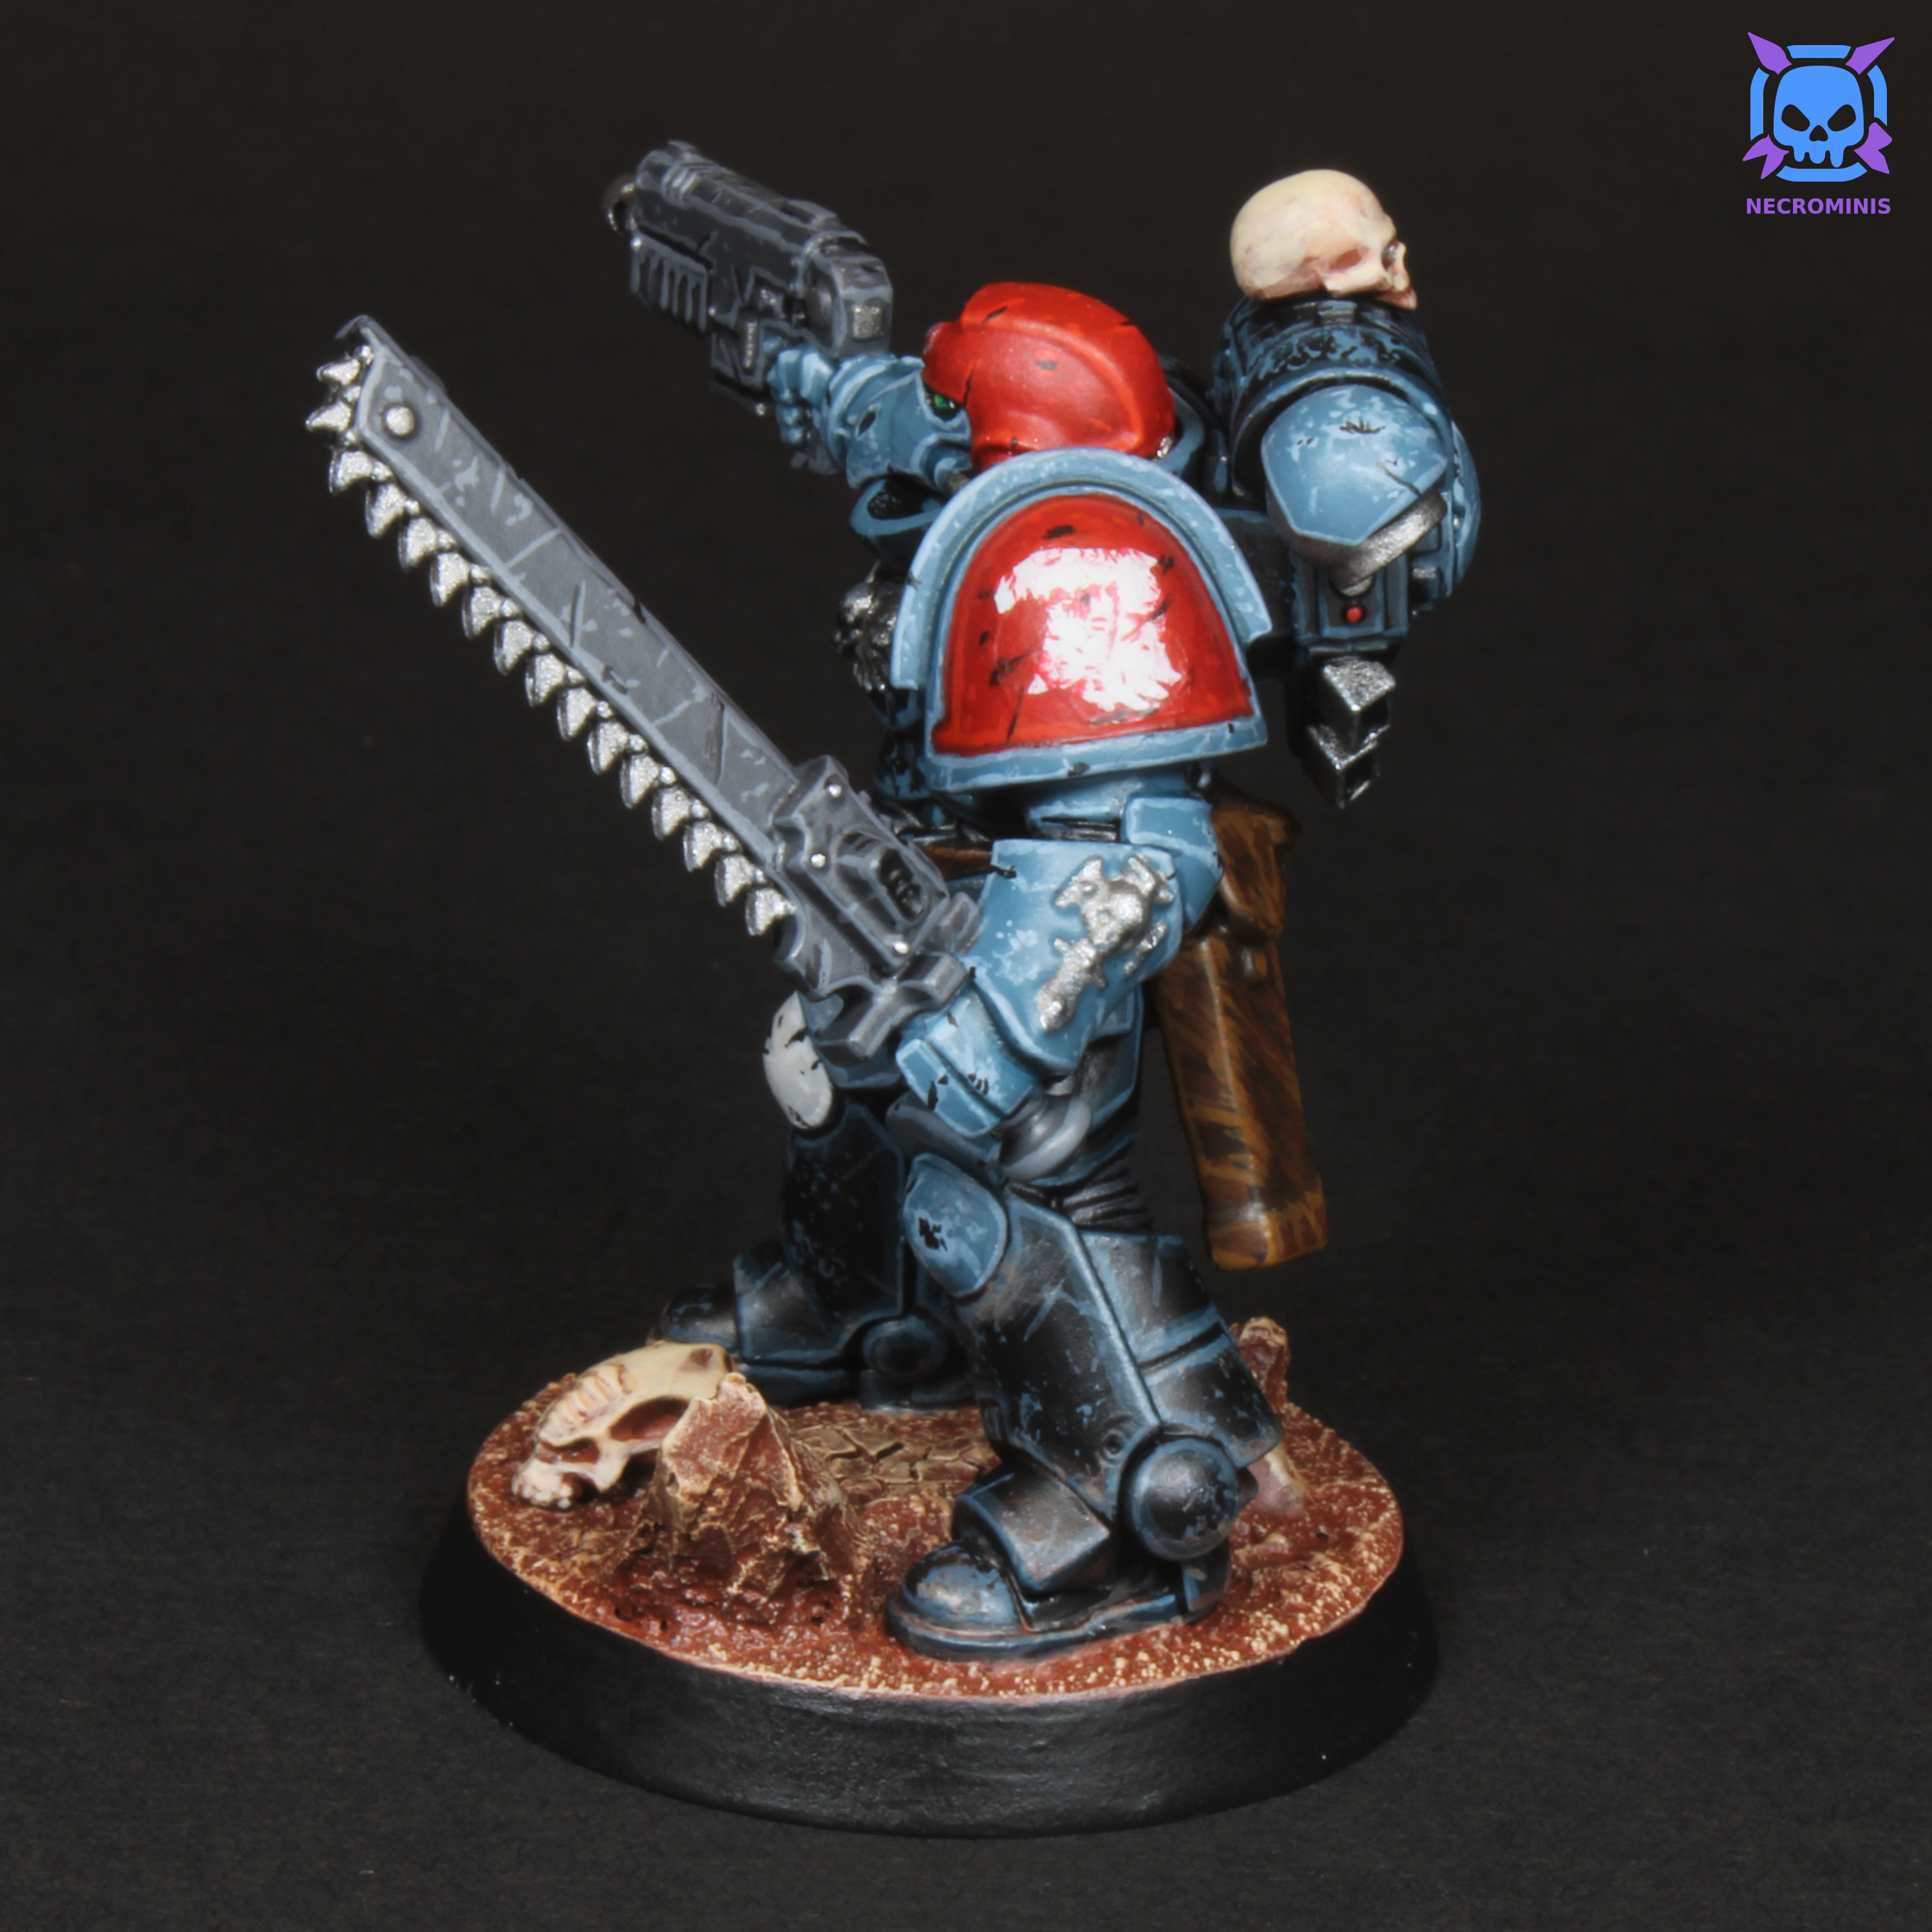
Now the the mini was ready, I worked on the base. The base had some small rocks and a rough texture already, but I wanted to make it feel more like terrain from the planet, Mars. I glued some cork Battlefield Rocks onto the base, as well as a Tyranidhttps://warhammer40k.fandom.com/wiki/Tyranids skull (also from the Citadel Skulls set). I then added some Rough Grey Pumice texture paste onto the base for a better looking sandy texture, and to blend the transitions between the base and the rocks. I finally added a few spots of Agrellan Earth texture paint for some spots of cracked, dry dirt.
Now that the miniature was ready to paint, I primed it black and then base coated it in the normal black paint I’d be using, since touching up the primer with paint will show the difference in color/finish. Since I planned on using messier techniques for the base, I painted it first. I gave the base a base coat of Terracotta, did a heavy dry-brushDry-brushing is the technique of wiping most of the paint off your brush and lightly brushing a miniature, in order to only catch the raised edges with a light dusting of a highlight color. with Cadian Fleshtone, and a lighter final dry-brush of Ushabti Bone. I then used a mix of stipplingStippling is a painting technique where you gently jab with the tip of your paint brush to create spotty splotches of color. It’s usually used for texturing rough-looking surfaces, or combined with glazing to create smooth blends. and layeringLayering is the technique of creating a smooth blend between colors by using multiple layers slightly thinned paint and shrinking each layer to create a smooth transition between colors. to paint the skulls on the base and backpack with these same colors, but with more of the lighter tans.
To start on the actual Space Marine, I edge-highlightedEdge highlighting is the technique where you paint the raised edges and corners on a miniature brighter than noraml, in order to help them stand out more, and because edges tend to reflect slightly more light in real life. the undersuit that shows through some gaps in the armor, and the straps with Eshin Grey. Next, I wanted block out which parts of the armor would be black and which would be blue, so I base coated the blue parts with Thunderhawk Blue. I then painted the black armor parts first. I did a thick edge-highlighted of Incubi Darkness and a thin edge-highlight with Thunderhawk Blue. To add some battle damage, I lightly sponged on some splotches of Thunderhawk Blue onto the black armor, and added a few scratch lines as well. For the blue armor parts, I edge-highlighted with Fenrisian Grey, and applied the same sponge and scratch techniques again. I used the blur armor’s colors to highlight the black in order to tie the miniature together with some coherency.
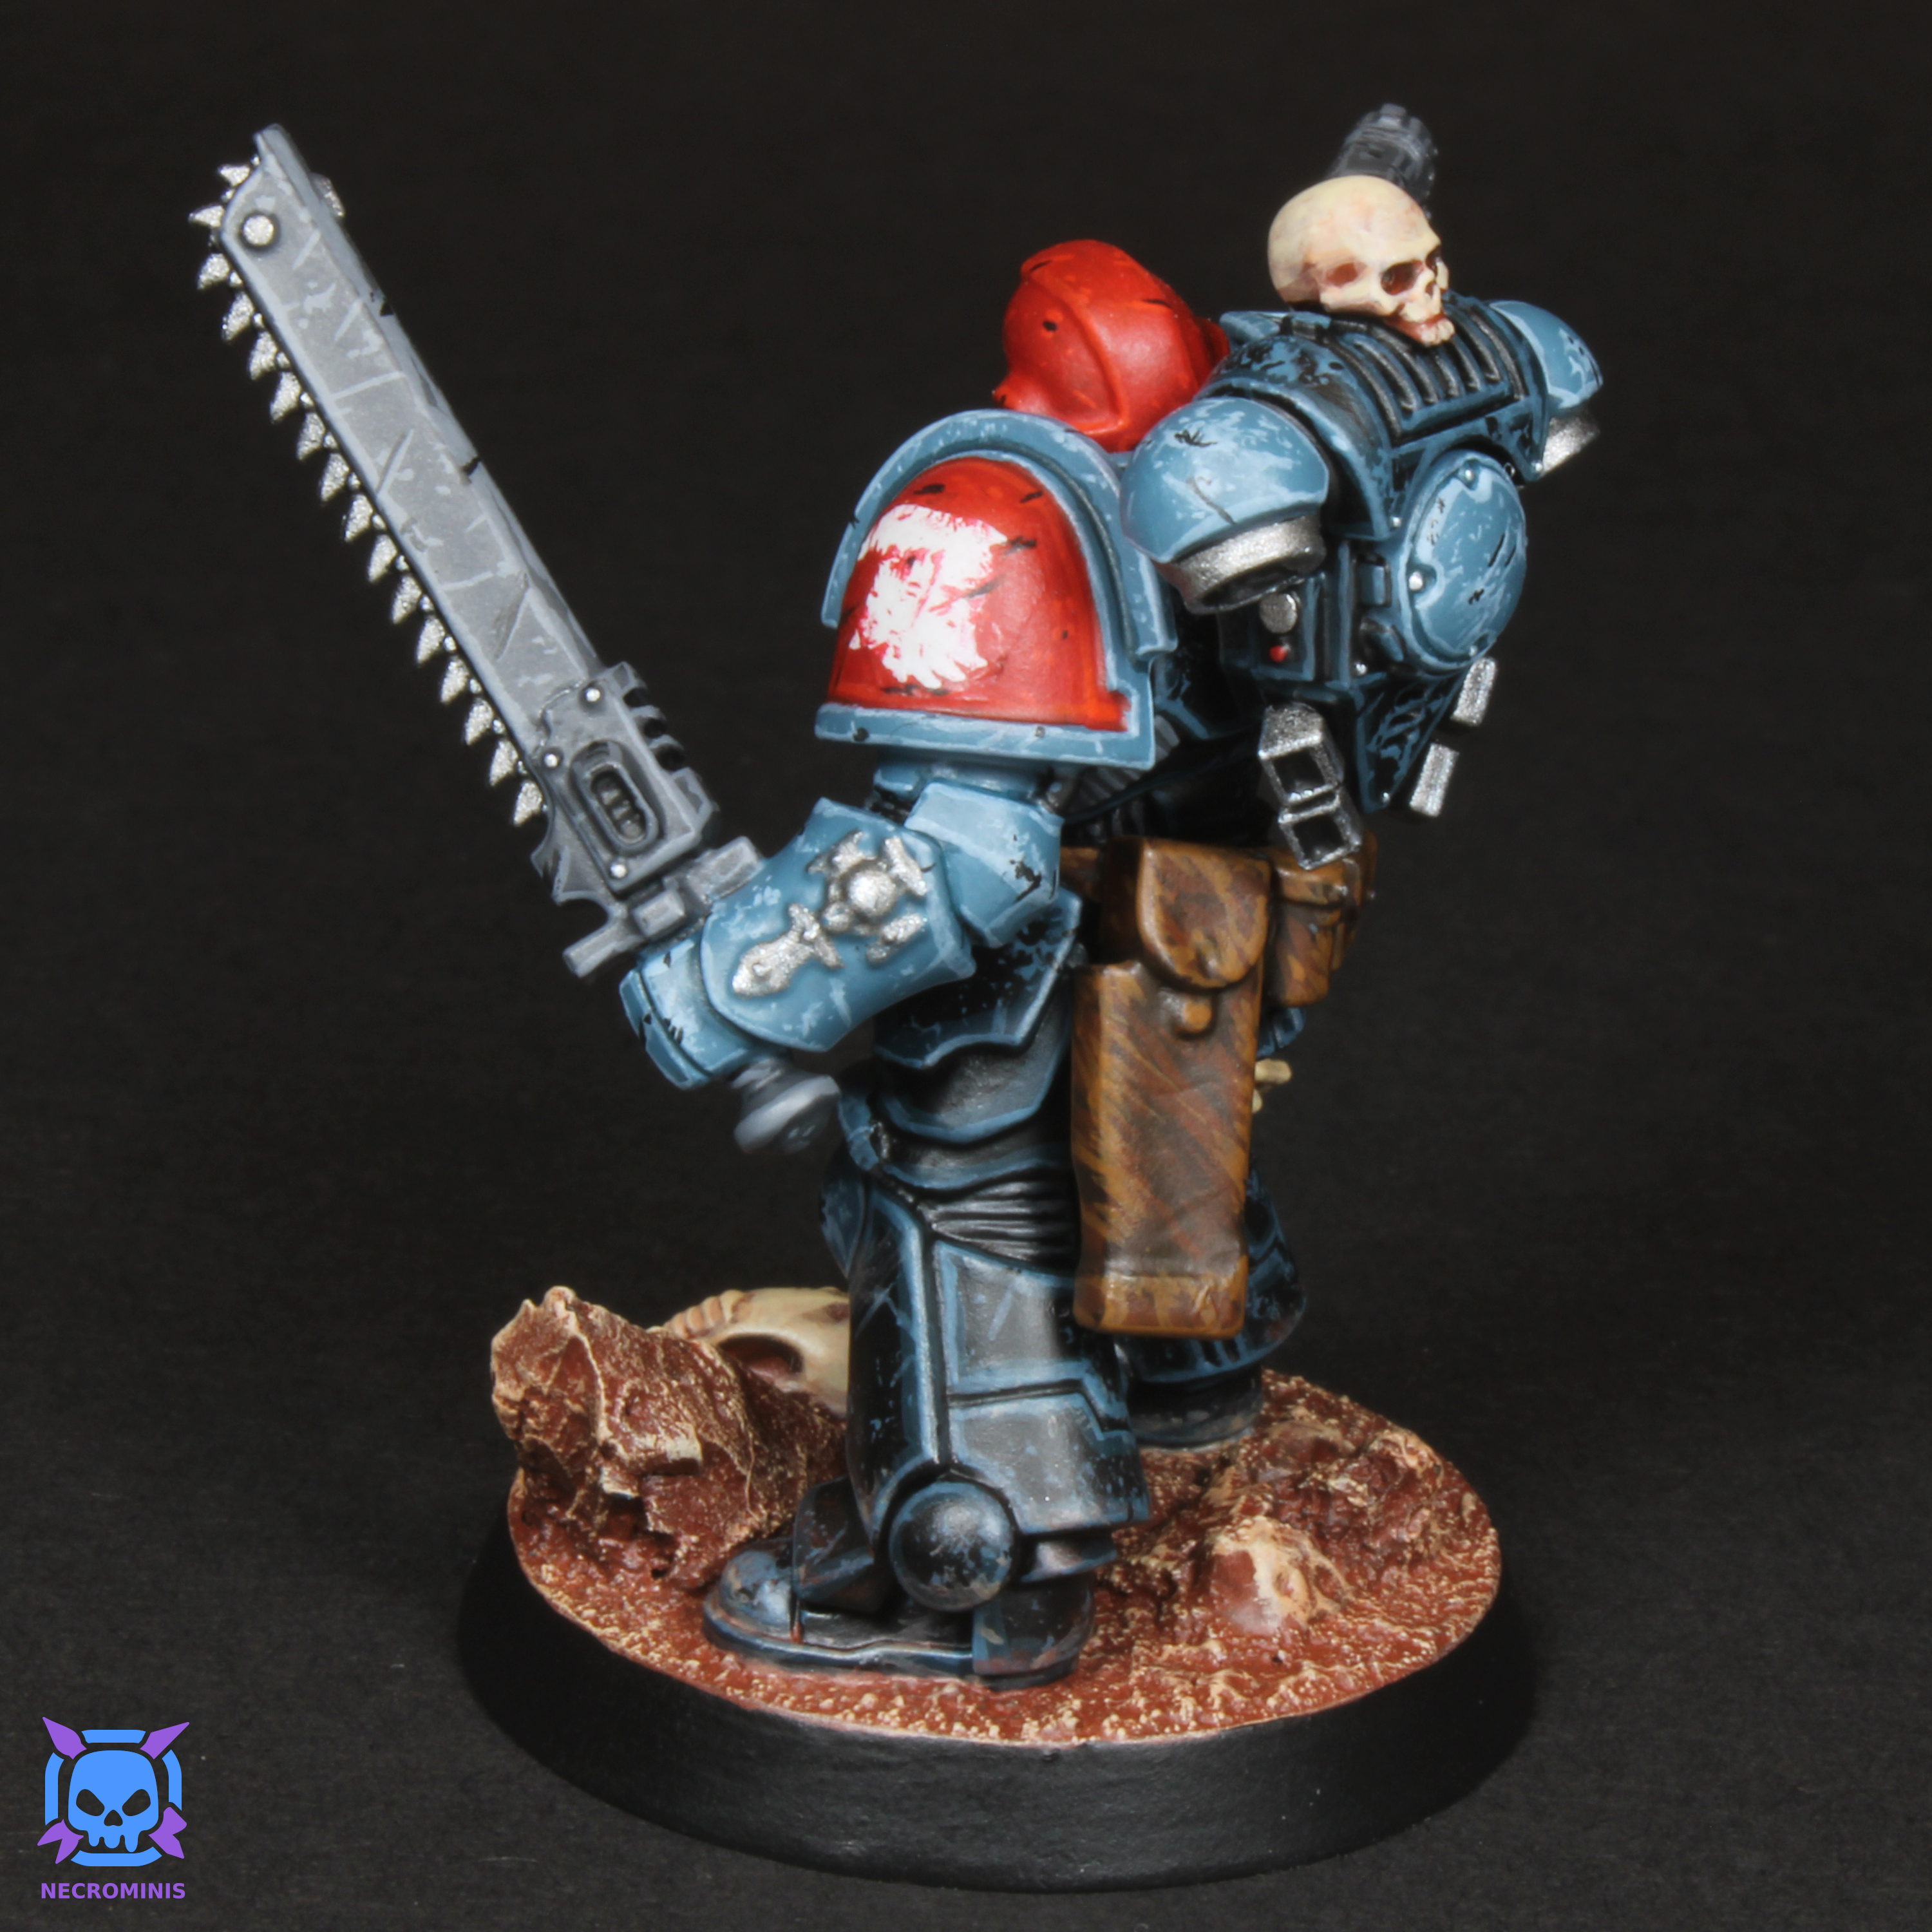
Next, I painted the red parts. The Astral Hawks have a symbol on their shoulder pad of a white hawk on a red circle, but I decided to just expand that circle to the whole shoulder pad. Since this specific Space Marine was a sergeant, it has a red helmet too. I base coated the red parts with Mephiston Red, then edge-highlighted them with Evil Sunz Scarlet. I then did a final edge-highlight on corners with Hot Orange, though the colors were so similar it had little effect. Again, I applied some battle damage by sponging on some splotches and adding some scratch lines.
Since I had the red out, I painted some of the wires and dots on the backpack red. I then painted the other wires and dots with Park Green Flat. And since I had the green out, I decided to paint the helmet lenses next. I base coated the lenses with Scurvy Green, then painded the innter half with Park Green Flat. I then painted the innter corner with Lime Green and painted a dot of White on the outer corners. This created the effect that the lenses were colored, but transparent and glossy. I also decided to paint some of the other details at this point. I painted the leather strap and bags with a base coat of Charred Brown, a scratchy layer of Flat Brown, and a scratchy edge-highlight of Beasty Brown. Finally, for the Purity Seal on the leg, I painted the stamp with Gory Red and the paper with Beasty Brown. I then layered Ushabti Bone onto the paper and added some thin black lines to resemble written text. I then gave it a washWashes are paints diluted with water, which can be "washed" onto a miniature in order for the paint to flow into the recesses, usually for shading purposes. of Reikland Fleshshade to add some slight shading to it.
Next was the white details. To start, I applied a custom Astral Hawks (raptor head) waterslide decal to the red shoulder pad. I used Micro Set to help it apply, but I really needed Micro Sol (which helps decals stretch around curved surfaces better). I then painted over the decal with Corax White, since I wanted its white to match the other white details I’ll be doing. I then added some red battle damage onto the white logo to make it look like it was painted on but was chipping away. On the other shoulder pad, I free-handedFree-handing is the technique of painting shapes and pictures (such as symbols, heraldry, etc. by hand, rather than with decals.) a white arrow (which symbolizes this Space Marine as part of a Battline squad). I also painted the right knee pad with Corax White as well, wich an edge-highlight of pure White. I added a white "II" to the shoulder pad to mark this Space Marine as part of 2nd Company, and painted a black "I" on the white knee pad to mark it as part of 1st Squadron. I then added some battle damage to these markings just like I did with the hawk logo.
The last things I needed to paint were the grey and metal parts. First, I base coated the grey parts on the weapons with Eshin Grey, and edge-highlighted with Neutral Grey. I then applied some battle damage with this color as well. For the metal parts on the weapons, backpack, helmet, and armor, I simply base coated them with Leadbelcher and edge-highlighted them with Silver. I also dotted any rivets on the mini with Silver as well.
Lastly, I noticed some of the battle damaged needed a little extra pop, so I added Black into the largest spots and scratches to give the effect that the paint had been scratched all the way to the bare metal underneath. Finally, I painted the base rim Black and gave the miniature a satin varnish (for protective purposes), then a matte varnish (for the final finish), and the miniature was complete.
Overall, I think this miniature turned out beautifully. The edge-highlighting and battle damage really pops, and the color scheme works well. This miniature will work as a good template for the rest of my army. That being said, there are some things I’ll need to change, when I start my army. First, the red is too bright. I wanted to use a darker red, but I didn’t have one at the moment, and I didn’t want to mix colors since this’ll need to be replicated to many miniatures and matching color mictures isn’t easy. This miniature also took about two whole days to paint. This will need to be shortened, so I can paint an army without taking a year to finish. The edge-highlighting takes up the most time, so I’ll have to experiment with a quicker and easier method of adding highlights. I might try to see if sponging battle damage toward the edges will be a good alternative. Overall, this miniature looks too good to be quickly replicated in bulk, but as a standalone miniature, it looks great. I might use this method on more important miniatures in my armies, like captains and unique characters.